Saturday, December 28, 2013

Breakfast smoothie

Good morning all, and happy Saturday! I hope your weekend has started off on a good note. I know that I didn't post yesterday, so I'll be doing two posts today to compensate for that. I hope that you guys like them!

The recipe this morning is a little different, in that it includes spinach (rather than kale) and a banana. Usually, I can't stand the taste of bananas, but I know that they are very nutritious, so I need to somehow get around that. This recipe is great for breakfast, and is one I have named my NanaBerry smoothie (working title, don't judge me!). If you guys have a suggestion for a better name, let me know!


Here are the ingredients:

Handful of spinach 
1/2 of a ripe banana
1/2 cup mixed (frozen) berries
1 tbsp honey
1/2 cup distilled water


I'd gotten a little too excited, and drank half of it before taking the picture. My overall feeling on this smoothie is that it's delicious! The spinach has a much less imposing flavor, so the fruit is able to shine through. In addition, this drink is helping with a headache that I woke up with this morning! I'm very happy with the results, but I'm going to keep working with the kale - I'm determined to make it work! Remember to live life, and eat well!

Thursday, December 26, 2013

Juicing Two-For-One!!

Good evening everyone! I hope you all had a merry Christmas yesterday, and were able to spend time with your families. Since I had the same juice two days in a row, I decided to combine the posts for yesterday and today. Here's the recipe:

2 ribs of dino kale
1/2 cup frozen berry mix
1 cup orange juice
3 tbsp honey
1 cup distilled water

It's the same procedure as my other juices this week (going forward, I'll just post the ingredients for the juices - you guys are smart enough to know what to do!)


Here are my thoughts on this juice:

1.) The flavor is definitely getting better - I think the citrus juice helped to tame the flavor of the kale some.

2.) I'm going to try spinach as my green - I know the kale is healthy, but that flavor is STRONG lol!

3.) Using frozen berries is definitely the way to go - I was able to use an organic antioxidant berry blend, and I really like how it tastes.

I like this juice, but I've still got a lot to learn! Remember to live life, and eat well!

Tuesday, December 24, 2013

Day 2: Hit or miss?

Good evening and merry Christmas Eve y'all! I hope you guys are as excited for tomorrow as I am. I may have gotten my presents already, but I couldn't be more grateful for the people and blessings God has placed in my life. So I look forward to celebrating the real reason for the season, the birth of Christ, even though I'll have to work.

For today's juice, I wanted to make something easy and a little sweeter than yesterday's juice. I was also interested in trying blueberries and peaches together. Side note: fresh berries keep horribly, so from now on I'll be buying frozen ones for juicing. 


Here's the recipe for today's juice:

2 ribs of Dino kale
Handful of blueberries
Half of a can of peaches, drained (or 1 large ripe peach)
1.5 cups of distilled water

I blended all of the ingredients together in the tall Magic Bullet cup until fairly smooth.


Here are my thoughts: 

1.) I honestly wasn't really a fan of this juice - it was way more sour than I'd anticipated, so I know I'll have to add honey to the mix next time.

2.) I didn't really like the fact that the peaches tasted canned in the mix...next time, I'll try a fresh (or frozen) peach, and see how it tastes.

Overall, it was a miss today. *Kanye shrug* it happens! Hopefully the mix will be better tomorrow. Good night, live life and eat well!


Monday, December 23, 2013

My first green juice!

Good afternoon!I hope you guys are doing well...I just wanted to quickly share an experience (and personal challenge) that I've recently come across! My parents were kind enough to give me a MagicBullet system as a Christmas present yesterday, and I absolutely LOVE it!!! In addition, they gave me various kinds of produce, so that I could start experimenting with green juice recipes. I love you guys! <3 

Anyone that knows me, knows that I am not really a salad kind of girl. In my mind, it is, and probably always will be, on the level of "rabbit food". (My brother and I used to have rabbits as pets, and we would actually feed them salad mix from time to time!) So, any chance to get some veggies in, have it taste good, and NOT have it in a salad is good in my book! That's where the Magic Bullet comes in. Now, I can blend up a green juice as I get ready in the morning, and drink it rather than a cup of coffee.

So, I've decided to try something new. I'm going to do my best to have a green juice every day for at least the next week, and see how my body feels! I'll be posting the recipes here, and letting you know my thoughts on them. Once I've gotten a recipe down to where I'd like, I'll even give the juice a name!

Here's the recipe for my Day 1 juice:

3 ribs of dino kale
7 raspberries
7 blueberries
7 blackberries
3 tbsp honey
1 cup of distilled water

I added the ingredients to the Magic Bullet tall cup, and blended until the mixture was fairly smooth.


My thoughts? I loved it! I was so excited to make this juice, that I forgot to take a picture of the ingredients before I blended them. The kale has a pretty strong flavor and smell, and the fruit wasn't enough to completely mask it, but I don't mind that. I may put in 2 ribs of kale though, just to see if that helps. I'm going to try a different fruit combo in the morning - I'm excited! Live life, and eat (and drink) well!

Sunday, August 25, 2013

An Ice Blue Treat

Happy Sunday everyone! I hope that all is going well for you. It's hard to believe, but the summer is pretty much over. *tears* However, you can still enjoy some summer flavor with today's recipe - blueberry frozen yogurt! 

This recipe is almost not a recipe at all - it's that simple to make! And, if you made some of my blueberry jam, then you'll be able to whip up some of this almost at a moment's notice. I tend to keep Greek yogurt in my fridge, since I use it to deep condition my hair (let me know if you want that mix!), so I know I'll be making this pretty often! It only takes 3-4 ingredients, but it tastes delicious! Try this out, and let me know your thoughts on it!


Blueberry Fro-yo (frozen yogurt)

3/4 cup plain Greek yogurt
1/4 cup blueberry jam
2 tbsp honey

1.) Mix all of the ingredients in a freezer-safe container. Taste, and adjust sweetness as needed (for more, add more honey; for less, add some lemon).

2.) Place in the freezer for about 2 hours (or until as firm as you like), stirring every 15 minutes or so to prevent the formation of large ice crystals.

3.) Enjoy!


You can garnish this treat with more blueberries and mint, or add other jams or fruit instead of/with the blueberry jam. Have fun with this! Personally, I'm gonna just eat it right out of the container (don't judge me!!) I hope you guys try this recipe out, and remember - live life, and eat well!

Sunday, July 21, 2013

Summer Jam! Blueberry Remix...

Good afternoon! The weekend is winding down, but I hope that yours has been relaxing, fun, and everything you needed after a tough work (or school) week!! I have to admit, I'm sort of not looking too forward to this upcoming week, but it is important and necessary for my health. As some of you know, I was diagnosed with Crohn's Disease in late August of last year, although I'd been dealing with the symptoms for a while before then.

On Tuesday, I will be undergoing a surgery that will hopefully improve my quality of life significantly, but that will also have me on a major turn-down for the next month or so. I say this not to garner pity, but rather as a request that you guys keep me in your prayers; you never know completely what someone else is going through - someone may look completely fine, but be dealing with something absolutely horrible. Only a few people really saw the consequences of my condition, and I hope to keep it that way. But, hopefully I will be (basically) back to normal once my body has healed post-surgery.

On a much lighter note, this post is for the first of my blueberry recipe posts; obviously, I won't be able to continue with the blueberry posts until after my recovery. However, I will start putting posts on here as I get better; they won't have pictures, but I'll be posting some of my favorite random recipes that I love to make, and I'll resume my blueberry posts sometime near the middle of August.

This week's recipe is for blueberry jam, in case you couldn't tell by the title - this is a wonderful way to have a piece of summer all year long, and was inspired by a Food Network show episode I recently watched. If you guys don't know, Good Eats is one of my absolute favorite shows, because it not only teaches you how to make recipes, but it teaches you the science behind that recipe, and what is responsible for making it work. I recently saw the Urban Preservation I: Jam Session episode, and became a little bit obsessed with the idea of making my own jam. I have pre-frozen blueberries, but you can absolutely freeze your own if you have fresh ones; place them on a cookie sheet and put them in the freezer until they have frozen solid; place them in a labeled plastic freezer bag and you have ready-to-go blueberries!! Easy, huh?


Blueberry Jam (this recipe filled up 3 8 oz. mason jars perfectly for me, but it may vary)

15 oz. frozen blueberries
Pinch of cinnamon
Juice of half a lemon
1 tbsp. apple cider vinegar
1 3/4 cups granulated sugar

Hardware:

Mason Jars with lids
Canning funnel (preferably stainless steel, but I used a plastic one)
Tongs (preferably canning tongs, but I used regular tongs - be very careful if you do this
Stockpot (or other very large pot)
Non-reactive saucepan
Non-reactive metal spoon
PATIENCE

1.) Wash all of the hardware thoroughly with hot, soapy water, then rinse thoroughly.

2.) Fill the large stockpot with hot water, then add the mason jars, rings (not the lids!!!! the sealing compount will melt), tongs, and the canning funnel (only if it's metal!!! otherwise, just place it on some paper towels). I would suggest having the tongs handle sticking out, so that it doesn't get as hot and you can use the tongs to pull out the equipment later.


3.) Bring the water to a boil, then let the equipment sterilize for 10 minutes; turn off the heat, then wait 5 minutes before adding the jar lids.

4.) Place the blueberries, cinnamon, lemon juice, and vinegar in the saucepan, then heat on low until the blueberries start to give off juice; then, start mashing the blueberries down with the metal spoon.

5.) Stir frequently and mash the blueberries until the mixture comes to a boil.

6.) Add the sugar, then increase the heat to medium-high and stir constantly until the mixture comes to a rolling boil (think magma!).


7.) Take out all of the equipment using the tongs, draining as much water out of the jars as you can, and place everything on a paper-towel lined cutting board.

8.) Place the funnel in the mouth of each jar, and fill with jam just until the level reaches the bottom of the funnel. DO NOT go past this, otherwise your jars may leak during processing.

9.) Wipe the mouth of each jar with a damp, clean paper towel, then place each lid on top. Don't press down!! It won't be necessary. Screw on the jar rings, just until tight - don't force it!

10.) Place the jars back into the stockpot using the tongs, then bring to a boil and process the jars (let them boil) for 5 minutes. Don't be fooled if you see a few bubbles floating from the top of the jars; this is excess air escaping from inside the jars, not boiling!

11.) Remove from the water and allow to cool on the towel-lined cutting board again for 8 hours, then press on the lid; if it doesn't move, you're good to go, but if it does, just store in the refrigerator and use in 2-3 weeks. Store in a cool, dry place with the rings off, to avoid rust and allow you to inspect the jars for spoilage..

I know this sounds tedious and complicated, but the truth is, it really isn't hard - the hardest part is waiting (or, trying to lift the sealed jars without canning tongs -_- lesson learned for next time)! I really hope you guys try this, but please be careful - keep oven mitts handy, and wear pants/a long-sleeved shirt just in case of splatters.

Here's a little background on the jam-making process:

While the exact origin of jam-making is a topic of debate, it most likely got its start in the Middle East, where cane sugar naturally grew. Marcus Gavius Apicius included jam recipes in his cookbook "Of Culinary Matters", which was written in Rome during the 1st century. Crusaders brought jams to Britain on their return, and the Spanish brought the process to the West Indies.

Jams, and jellies became wildly popular in Europe, and allowed people to enjoy fruit year-round while still obtaining nutritional benefits. However, they were enjoyed mainly by royal households - in particular, Louis XIV ended his royal feasts with fruit preserves in silver serving dishes. Jam dates back to the Tudor times in Britain, and was available in a wide variety of flavors and types. The first American cookbook to include jam recipes dates back to the 17th century; early settlers used various sweeteners (i.e. molasses, honey) and got pectin from boiled apple peels to thicken jams.

Since jams lasted much longer than fresh fruits, and still served as great sources of Vitamin C (prevents scurvy), they became very important for crews on boats. Although it is usually mass-produced now, it is simple to make and can last for at least a year, usually more.

Sources:

http://www.jamjamboree.org/history.html
http://www.purejam.com/History_of_Jam.htm
http://www.jelly.org/lore.html

Friday, July 19, 2013

My Italian One-Pan Chicken

Another work week has ended! Huzzah!! Lol! Change seems to be the key word for my life right now - I just graduated from Johns Hopkins University in May, and now have a bachelor's degree in Chemical & Biomolecular Engineering (it's a bit of a mouthful!). My dream is to own a Michelin-star rated restaurant, but I am realizing that my path to get to that dream isn't, and won't be, the conventional one. That's fine with me - I love challenges!! While I figure out my life plan, I hope that you all will continue to view and use the recipes I post here; don't forget, I want to see your comments, questions, and requests here!! (So far, no one has left a comment, but hopefully that will change soon.) Anyway, here's a random, but tasty, recipe: Italian One-Pan Chicken!

This recipe is perfect for summer. It is light, easy, and fairly quick to make - since I came up with this recipe myself, there isn't really any history behind it. I made this recipe for a coworker, and in the process realized that it's a perfect weeknight entree for warmer months - with some pasta or rice, this will satisfy hunger without causing any drowsiness.


Italian One-Pan Chicken

2 lb boneless skinless chicken thighs
2 lemons, quartered and seeded
1 yellow onion, cut into 6 wedges
1/4 cup white wine
1/2 cup olive oil
Salt and pepper to taste
1 1/2 tsp Italian Seasoning

1. Preheat the oven to 350 degrees F. Line a baking sheet with aluminum foil, and spray with a little non-stick cooking spray.

2. Place the chicken thighs, lemons, and onion wedges on the baking sheet; keep in mind that this doesn't need to be specifically arranged - the lemons and onions are there to simply flavor the chicken.

3. Drizzle the white wine and olive oil over the mixture, then sprinkle on the seasonings. Place in the oven and bake for 45 minutes, or until the chicken is no longer pink in the middle. Enjoy!

Unfortunately, I didn't get a picture of the finished product - next time I make it, I'll update this post. Remember, live life and eat well!

Sunday, July 14, 2013

Spotlight #1: I'm Blue...

Good morning!! Ahhhh, it's summertime, & we now have the heat & humidity to prove it...unfortunately. But, summertime also means plenty of sun, pools & beaches, as well as a plethora of fruits and vegetables that thrive this time of year. For the next few weeks, I hope to be able to focus on a very special ingredient that really comes into its own during the warm summer months.

What is this ingredient? Here's a hint: remember the Blue Man Group song I'm Blue? If fruits had a theme song, that would be the most likely candidate for this fruit (even though it's technically purple...) It's full of antioxidants, vitamins, and it's pretty tasty on its own to boot! Have you figured out what it is yet?

This segment's theme ingredient is.....*drum rolls*

Blueberries!!!


That's right, I'm gonna focus on the round little purple jewel that is overly abundant this time of year. It's great fresh, and pretty good frozen - I'm gonna focus my next few posts on this wonderful little summer fruit! I'm excited, & I hope you are too.

Blueberries as a species are estimated to be about 13,000 years old, and are indigenous to North America. By the time the Europeans arrived, the Native Americans had already found various uses and preparations for blueberries, such as drying, grinding into powder, adding whole to soups and stews, and even for medicinal purposes. Interestingly, the Native Americans referred to blueberries as "star berries", because of the star-shaped blossom end of the fruit. Europeans used bilberries, a close relative to the blueberry, in various forms for medicinal uses as well; they used the roots to make a tea that helped women relax while giving birth, made a syrup to soothe coughs, and ate the berries to improve eyesight.


Blueberries have all sorts of health benefits, and can be enjoyed in various forms; however, you will get the most nutritional benefit from eating them raw. Blueberries contain more anti-oxidants than any other fruit or vegetable, which fight free radicals in our bodies and help prevent damage on the cellular level. Blueberries contain vitamins A, B6, B12, C, D, E, and K, as well as thiamin, riboflavin, niacin, folate, pantothenic acid, choline and betaine. In addition, they contain protein, calcium, iron, magnesium, phosphorus, potassium, sodium, zinc, copper, manganese, and selenium. Blueberries have been found to improve memory

The bluish-purple pigment is caused by the presence of anthocyanins, which are antioxidant compounds that give several foods their blue, purple, and red hues. Since anthocyanin concentrations don't significantly decrease as a result of freezing, you can freeze fresh berries without having to worry about a lessened antioxidant benefit. Also, blueberries have a low glycemic index (GI), and have been found to positively affect blood sugar regulation for people that have been diagnosed with type 2 diabetes. So, with all that said, eat as many blueberries as you can!! The time is right, and they are just ripe for the picking! (Sorry...I couldn't resist! *giggle*) Live life, and eat well!

Sources:
http://www.blueberrycouncil.org/blueberry-facts/history-of-blueberries/
http://nutritiondata.self.com/facts/fruits-and-fruit-juices/1851/2
http://www.whfoods.com/genpage.php?tname=foodspice&dbid=8

*Side note: I just want to say that I am deeply saddened by the fact that Zimmerman was found not guilty yesterday; my prayers go out to the Martin family, Trayvon's friends, and the black youth across this country. I can only hope that we can use the hurt and pain we feel to cause positive change for our generations, as well as future generations within this country.

Monday, July 8, 2013

Hand Pies, For the Win!

Hello all! I hope that all is going well for you guys. The summer is winding down, but I'm still working on the blueberry theme, as I promised in my last post. The past three weeks have been very...interesting to say the least, and a lot has changed in my life in that time. I had my surgery on July 23rd, and have been recovering as I should since that time - all is going well, thank goodness :-) In addition, tomorrow is my first full day of living life as a college graduate and working adult, as I start my first real job with GlaxoSmithKline (a pharmaceutical company). I can't wait to get started!!

But I digress. This week's recipe is for blueberry hand pies, which are basically calzone-shaped portable pies and is really easy to make. If you made the blueberry jam from my last post, and have some of the tart crust recipe from the A Sweet Little Tart post, you can make these little treasures whenever you want!

Blueberry Hand Pies

1 recipe of my Tart Crust
Blueberry jam
1 egg

1.) Preheat the oven to 400 degrees F.

2.) Once the dough had chilled, roll it out to about an 1/8" in thickness, then use a round mold to cut out dough circles

3.) Beat the egg lightly to form the egg wash, then place a small amount of jam in the center of the dough circle, bush on a little egg wash, then fold the dough over and press to seal the edges. Place on a foil-lined baking sheet.

4.) Once the hand pies have all been made, brush on a little more egg wash on top of each one, then place the pan in the oven.

5.) Bake for 30 minutes or until golden brown, then allow to cool for 5-10 minutes before eating.


Like I said, this recipe is really easy to make, especially if you have the crust and jam already made. You can use the store-bought versions to make it even easier. My adviceis to make sure that your kitchen is not too hot; otherwise, the dough will get sticky and hard to shape. I hope that you give this recipe a try, and remember: live life, and eat well!

Saucy Little Jewels

Happy Sunday everyone! I hope all is going well for you guys. As the weekend winds down, and we prepare for another work (or school) week, I thought I'd give you all an easy recipe that can be used for a quick breakfast during the week. I'm still going along with the blueberry theme, and this week's recipe is...mini blueberry muffins!

For me, tomorrow starts my second week of training at my new job with GlaxoSmithKline, and the past week has taught me three things. First of all, I have a lot to learn in the next two weeks, but I also have very supportive team members and resources to get answers to my questions. Secondly, I can be a morning person if I put my mind to it (anyone who knows me knows that morning isn't usually my favorite time of day). Lastly, I have to plan ahead with my meals, because I don't have the energy to make anything elaborate after work, nor the time to do it in the morning. These muffins will make my mornings easier, because I can make them on a Sunday and refrigerate/freeze them to eat later in the week. They're easy to make, and delicious and great for kids (the blueberry juice makes the muffins swirled with blue!)


Mini blueberry muffins (makes 24)

2 cups all-purpose flour
1/2 cups granulated sugar
1/2 tsp salt
1 tsp baking powder
1/2 tsp baking soda
3 tbsp canola oil
1 egg
1 cup Greek yogurt (or a 7 oz container)
1/2 cup milk 
1 cup blueberries

1.) Preheat the oven to 350 degrees F. Spray two mini muffin pans with non-stick spray, and place muffin cups in the spaces (optional).

2.) Mix the dry ingredients (first 5) together in a large mixing bowl. Form a well in the middle of the dry ingredients.

3.) Mix the egg, Greek yogurt, milk, and oil in a separate bowl (or measuring cup). Add to the dry ingredients, along with the lemon zest.

4.) Mix the blueberries with 1/4 cup all-purpose flour, then add to the mixture and fold everything together. The batter should be thick and still have lumps in it.

5.) Spoon the batter into the muffin pan, then bake the muffins for about 15 minutes, or until a toothpick inserted inthe middle comes out clean. Allow for the muffins to cool for 5 minutes before serving, or completely if you plan to refrigerate or freeze them.


This recipe comes together pretty quickly, and I hope you guys give it a try!! Let me know what you think of this recipe by leaving a comment!! Remember, live life and eat well!

Saturday, May 18, 2013

Focaccia for everybody!

Change. That seems to be the theme word for my life right now. Last post, I announced that I was accepted to an Italian Culinary Experience program with the International Culinary Center, however I have decided that I will not be pursuing this program after all... Here's a tip for those looking at academic programs (regardless of the subject): if the school doesn't have an itemized list of expenses that you can easily access, look for a different program! They can charge you whatever they feel like charging...be careful!! Instead, I will be working towards starting a Culinary Institute of America program within the next year. I will get to Italy, but it doesn't appear to be my time yet; that's ok, I'm willing to wait :-)

On a happier note, I recently made a batch of homemade focaccia, which is an Italian yeast bread that is very similar to a deep-dish pizza crust. This flatbread is thought to have been made by the Ancient Greeks, or the Etruscans living in Italy before the Roman Empire. The name is derived from "panis focacius", which refers to a flat bread cooked on a hearth or under ashes from a fire. Originally, this bread was cooked by either of those methods, then punctured with a knife to allow the bubbles to escape. Now, the top of the bread is dotted with fingertips before it is placed in the oven; olive oil is drizzled onto the surface of the bread to prevent it from drying out.


2 1/2 cups (unbleached) all-purpose flour
1 tbsp. salt
1 package instant yeast
2 tablespoons extra virgin olive oil, plus extra for drizzling
1 cup warm water
Topping(s) of your choice

1.) Preheat the oven to 450 degrees F.

2.) Place the flour, salt, and yeast in a large mixing bowl, then stir to combine. Create a well in the middle of the flour mixture, then add the oil and warm water. Mix to create a slightly shaggy dough.

3.) On a lightly floured surface, knead the dough until it becomes elastic. Oil another large mixing bowl, then add the dough and turn to coat in the oil; cover with plastic wrap. Sit the bowl in a warm place, and allow to rise for 1 1/2 hours, or until doubled in size.

4.) Cover a baking sheet with foil, then add a little bit of olive oil and coat the foil. Then, punch down the dough to force out some of the air, and stretch it into a rectangular shape on the baking sheet. Be careful not to force the dough or tear it! Dimple the surface of the dough, then allow it to rise again for 45 minutes. Once the dough has been rested, drizzle the dough with olive oil, then add the toppings of your choice.

5.) Bake the bread for about 20 minutes, or until golden brown. Allow the dough to cool for about 5-10 minutes before cutting into it. Then, enjoy!!


I picked up a package of unbleached all-purpose flour from my local grocery store, although at the time, I hadn't really given much though to why. It sounded like it should be healthier for me (I feel as though I probably shouldn't be eating anything that's been in contact with any sort of bleaching agent - Clorox comes to mind, although obviously that's not what is used.). When wheat is ground to make flour, it has a natural yellowish tint to it; once it is exposed to air for a period of time, the pigment naturally oxidizes to a white color - this is unbleached flour. In order to make the flour even whiter, the flour is then exposed to benzoyl peroxide or chlorine gas to turn it even whiter.

I was very surprised to learn that the nutritional value of bleached and unbleached flour is actually the same; the only real difference is that unbleached flour has more protein in it, making it a better choice for breads and doughs that need gluten in them. So, before you toss out your regular all-purpose flour, I'd suggest that you keep it around for batters and pastries! For the focaccia toppings, I'd suggest dried herbs and sea salt (simple really is best here); if you are going to use fresh herbs, I'd suggest adding them at the end of cooking so that they don't burn.I hope you enjoyed this recipe, and try it out - let me know how the results turn out!

Sources:
http://suite101.com/article/the-italian-flatbread---focaccia-a295419
http://www.abigailsbakery.com/bread-recipes/history-of-focaccia-bread.htm
http://www.livestrong.com/article/533356-nutrition-of-bleached-vs-unbleached-flour/

Friday, March 29, 2013

Pizza and a Lovely Trip!

Hello all! Oh, how I've missed you! I'm sorry I've been so MIA on here, but it's been an interesting time...thank you for bearing with me. Since my last post, I've received some exciting news - I have been accepted to the International Culinary Center's Italian Culinary Experience program! As many of you know, I have dreams of owning my own restaurant and absolutely LOVE to cook any and everything - this program will allow me to study in New York City, then Parma, Italy, for 4-5 months towards the end of this year. I'm so excited!!! As a result, I will be taking a break from the usual set-up of the posts on this blog, and will be sharing my journey with you all (as well as new recipes and tips that I learn along the way).


Although I made this recipe before I received the news, I decided to make pizza from scratch for the first time last week. I was amazed to find out that pizza is actually ridiculously easy to make, and now I have enough dough leftover to make 3 more personal pizzas! This dough freezes brilliantly, and I love that because now I can have a scratch-made pizza in about 20 minutes after letting the dough thaw out; this is perfect for weeknight meals, especially for students. My only warning? It does take some time to make the initial batch of dough, so I'd advise doing it on a weekend morning, then portioning and freezing the dough for later meals throughout the next couple of weeks.


Pizza dough
(I was able to get 6 personal pizzas' worth, but the servings depend on the size of the portions you make.)

2 cups of all-purpose flour
1 tsp. sea salt (regular salt also works fine)
1 packet of instant yeast
2 tbsp. olive oil
1 cup of warm water

1.) Mix the first three ingredients in a large mixing bowl, until they are combined.

2.) Add the water and olive oil, then mix to form the dough. Then, turn the dough onto a lightly floured surface, then knead until the dough becomes smooth and elastic. This takes a little elbow grease, but it will come together.

3.) Add some olive oil to a large bowl, then toss the dough in the oil to coat. Allow the dough to rise for about 1-2 hours, depending on the temperature of your kitchen (warm room? 1 hour should be fine. Not so warm? Let it rise for longer.) The goal here is for the dough to double in size.

4.) Once the dough has risen, punch it down a little bit then turn it onto a floured surface and knead it a little more. At this point, you can portion the dough and freeze or refrigerate it.

5.) Preheat the oven to 500 degrees F. Make sure the dough has had time to thaw completely before using it (if you choose to freeze it).

6.) Place some olive oil on a baking sheet, then stretch the dough to form a disk and place on the sheet. Add the toppings of your choice.

7.) Bake for 8-10 minutes, until the cheese is bubbly and the dough is lightly golden brown on the edges. Let it rest for about 5 minutes on a plate before you cut into it, then enjoy!


I hope you guys try this recipe, and let me know how it turns out!

P.S. I've been going on a natural kick lately - I've turned to using natural olive oil soap on my face, and recently got another natural soap that I love so far. Today, I'm proud to say that I made lip balm for the first time, and I'm calling it my honey double butter balm; it has shea and cocoa butters, and is very moisturizing on my lips - I may never buy another lip balm again! If you're in the Charles Village, Baltimore area and would like to try one as well (I have 8 more), let me know!

Saturday, November 3, 2012

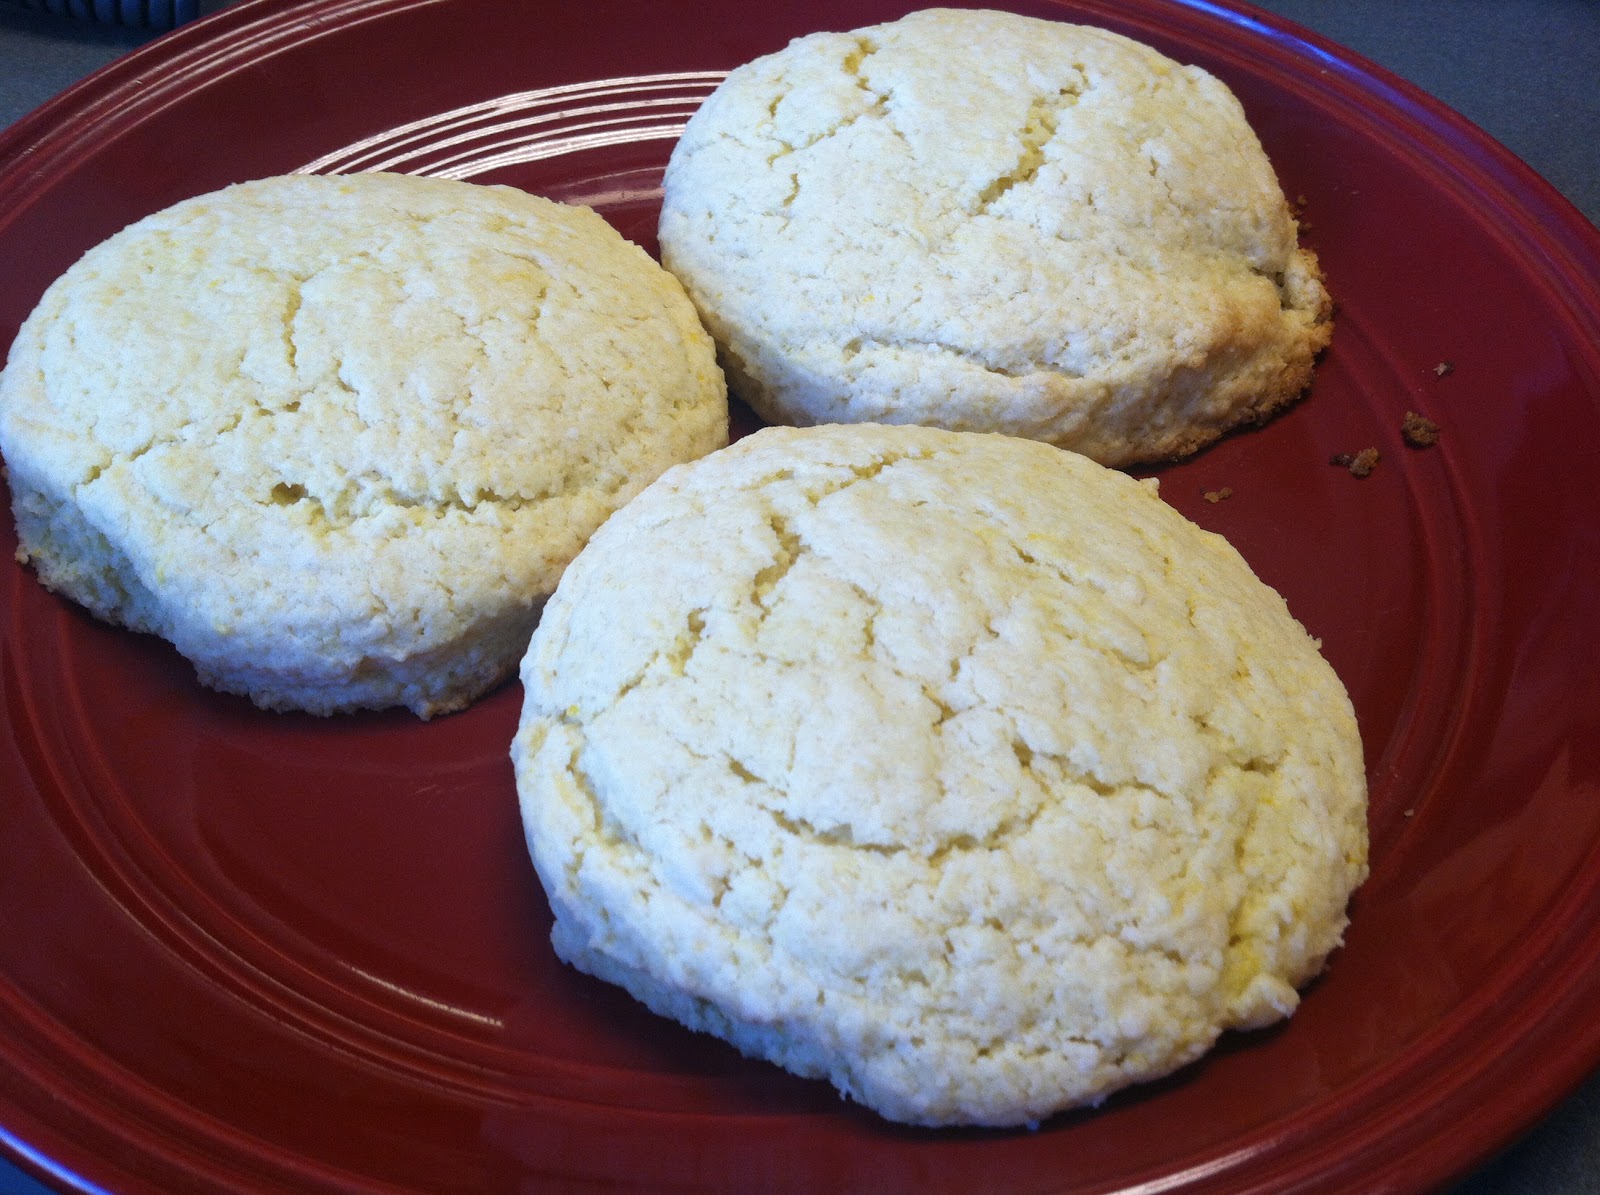
Sweet potato biscuits

Hello all! As promised, I have another dessert recipe for you guys! Even though the holiday season has passed, I still love working with sweet potatoes & came up with this recipe one night when I realized I didn't have the ingredients for a pie. Thank goodness this worked better than I expected!!

They turned out really well, and remind me of the biscuits that the English's Chicken restaurant in my hometown (hey Salisbury!) makes. These are not the same, but they do fill the craving that I often get for those biscuits. I hope you guys enjoy this recipe!

1 29-oz. can of sweet potatoes
3 cups all-purpose flour
1 cup sugar
2 tsp salt
1 tbsp cinnamon
1 1/2 sticks cold butter, cubed

1. Preheat the oven to 425 degrees F. Grease a baking sheet, then set aside.
2. Place the dry ingredients in a large mixing bowl & stir well to combine.
3. Making sure that the butter is cold, cut it into the dry mix with a pastry cutter, 2 forks, or your hands.
4. Drain the sweet potatoes, then add them to the mixture and mix well.
5. On a lightly floured surface, roll the dough out to about 1/4" thick, then cut out the biscuits using the cookie cutter of your choice; place them on the prepared baking sheet.
6. Place the biscuits in the oven and bake them until they are golden brown around the edges, about 15-30 minutes (depending on their size). Allow them to cool slightly before serving.

I love these biscuits so much, and they can be served in several ways. My favorites? I can eat them all day with a little cinnamon sugar compound butter! I hope you try this recipe, and let me know how it turns out! Remember, live life and eat well!

A Crisp for Pears...? YES.

Hello all! I hope that everyone on the East Coast is getting back into the swing of things after Hurricane Sandy last weekend; my heart goes out to those directly affected by it, and I'm praying for all of you!

Since we are in the season of fall, and on the cusp of winter, I figured that a nice warm dessert is in order; usually, this crisp is made with apples, but surprisingly it's actually better with pears! Just to make things a little more interesting, I also added a drizzle of caramel on top and it turned out AMAZINGLY! (Gotta love when a plan comes together :-) ) This dessert is seriously easy; you can easily substitute apples, peaches, or whatever fruit you desire for the pears (the decision on whether or not to add the caramel is completely your call). I will feature apples in a later segment, and will make a twist on the typical apple crisp then, so I won't cover the history of the recipe this time. (Don't worry, it's coming though!) Let me know what you think of this recipe in a comment, and remember: Live life, and eat well! 

Pear Crisp:

1 can of pears
1/4 cup all-purpose flour
3 tbsp of granulated sugar
1/2 tbsp butter

1.) Preheat the oven to 425 degrees F.

2.) Cut pears into pieces and place them into 2 ramekins (or small oven-proof bowls). Place into a baking pan.

3.) Place the dry ingredients into a bowl; stir to combine. With a fork, cut the butter into the dry ingredients. (Basically, mash the butter into the dry ingredients until the butter is broken up into small pieces.)

4.) Sprinkle the topping onto the pears, then place into the oven and bake for 25 minutes, or until golden-brown on top. Allow to cool slightly before adding the caramel.

Caramel topping: (makes a lot, so if necessary cut this recipe in half!)

1/4 cup granulated sugar
1/4 cup of water
1 tbsp butter
2 tbsp of heavy cream, plus more if needed

1.) In a small saucepan, combine the water and sugar over medium heat.

2.) Cook the mixture until it turns a light golden color. Be very careful; once this mixture starts to turn yellow, it progresses really fast to burnt so turn off the heat when the color is somewhat lighter than what you'd consider done.

3.) Add the butter to the mixture and allow to melt, then add the heavy cream; stir to combine. If needed, add more cream to achieve the right consistency.

4.) Drizzle on top of the crisps, then dig in!

PSA: I'm working on trying to make weekly posts, so bear with me until I can get this together! Thanks for the support, you're awesome :-)

Thursday, October 18, 2012

A Sweet Little Tart

I don't know about y'all, but when it comes to desserts, pies and tarts are definitely among my top favorites - if I could get my dad's key lime pie for every birthday for the rest of my life, rather than a cake, I'd be a happy girl. That being said, it's only natural that a tart recipe would be the first in my tribute to the lovely pear. I've gotta say that this was the first time I'd made a tart from scratch, and it turned out much better than I'd expected. This recipe is designed to be very easy to make; honestly, the hardest part is waiting for the dough to set-up, but the results are definitely worth it!! I hope you enjoy this recipe, and let me know what other types of recipes you'd like to see me post.

Sweet Tart Crust

1 1/2 cups of all-purpose flour
1/2 cup granulated sugar
1 tsp salt
8 tbsp cold butter, cubed
1 egg
1 cup ice water

1.) Sift the dry ingredients (flour, sugar, salt) into a large mixing bowl.
2.) Using a fork, pastry cutter, or your fingers, rub the butter into the dry ingredients until the butter becomes pea sized or a little smaller. I suggest using a fork for this, because the heat from your hands can melt the butter (making a huge mess), and a pastry cutter doesn't necessarily need to be bought.
3.) Add the egg and water to the dough, and mix until it becomes too hard for you to stir; form the dough into a flat disk, and cover with plastic wrap.
4.) Refrigerate the dough for 30 minutes, or freeze the dough for 10 minutes. Either way, make sure that the dough has time to set up.
5.) Flour a flat surface, then roll the dough out until it's about 1/8 inch thick; cut out rounds with a 2 inch cookie cutter. You are now ready to assemble the tarts.

To make the tarts:

1 or 2 cans of sliced pears
Honey or apricot preserves (optional)

1.) Preheat the oven to 350 degrees F.
2.) Drain the pears thoroughly, then arrange them on the dough rounds any way that you'd like. Make sure to leave the edges of the dough free, then fold the dough up over the pears and press down to seal it.
3.) Place the tarts on a floured or greased baking sheet, then bake for 45 minutes or until the dough has turned golden brown.
4.) Warm the honey or preserves, then use a pastry brush (or drizzle) the topping onto the tarts, then serve once they've cooled somewhat.

Remember: live life and eat well!

Sunday, July 29, 2012

A Souffle By Any Other Name...

Oh, the souffle - light and airy, sweet or savory, but with the reputation of being tough to make; this couldn't be further from the truth. The souffle has two main components: a base made with egg yolks and flavorings, and whipped egg whites, which provide the lift. While in the oven, the air from the egg whites allows for the souffle to rise, but also causes it to fall somewhat once it leaves the oven. The word souffle in French means "puffed up" (an accurate term), that was invented in France during the late 18th century. The initial souffle recipe was for a Souffle au Fromage, or cheese souffle.

There are a few key recipes that I wanted/want to perfect by the end of the summer; this is one of those dishes, and I must say that I'm very happy with the result. You can serve this with a custard sauce, a good dusting of confectioner's sugar, or on it's own if you underbake it ever so slightly. The main thing to keep in mind, is that the bowl and whisk for the egg whites must be clean, otherwise they won't whip up properly. For those of you wondering how exactly a souffle is able to rise, feel free to visit the second source on this page, which gives an in-depth explanation of the rising mechanism. Also, you can change this recipe to use whatever fruit, chocolate, or savory flavoring your heart desires. Live life, and eat well!


Orange Souffle (makes 4)
(Adapted from Mark Bittman's recipe in How to Cook Everything)

2 eggs, separated
Juice & zest of 1 Valencia orange
1/2 cup of granulated sugar

1.) Preheat oven to 350 degrees F. Rub the inside of the ramekins with butter, then place about 1-2 tablespoons of sugar in the ramekins and swirl to coat. Tap out the excess sugar, as needed.

2.) Place the egg yolks into a medium mixing bowl; add the sugar and whisk together until the yolks lighten up in color and become thick (when the whisk is taken out of the bowl, the yolks should fall in a thick ribbon back into the bowl). Add the juice and zest, then set aside.

3.) Place the whites in another medium mixing bowl; whip until they hold stiff peaks when the beater is taken out. Take a little bit of the whites and add it to the yolk mixture, to lighten it; then, add the rest of the whites and fold to incorporate thoroughly.

4.) Divide the mix between the ramekins, then place them into a large baking pan to make transfer easier. Bake for about 15-20 minutes, or until the mix has risen and set up.


Some things to keep in mind: when you first add the whites to the yolks, the mixture will look really runny; don't be discouraged, it gets better once you add the rest of the whites in. Also, don't stir the second addition of whites, otherwise you'll beat the air out of the mix and it won't rise. Hope you'll give this a try! Live life, and eat well!!


Sources:
The Inspired Table
Visiting France

Wednesday, July 25, 2012

An Orange-Kissed Scone You'll Love

I think I've fallen in love...with a scone. Yes, a scone. Fluffy like a biscuit, but considerably lighter (and not so much like butter), a scone is a wonderful, pillowy morsel that pairs spendidly with tea and honey. I love bread of all sorts, but the scone is quickly becoming my favorite. Of course, it can be served with clotted (or whipped) cream, butter and jam - the serving options are pretty similar to biscuits. I can tell that a lot more of these will be made in the near future.

Considered a British teatime staple, the scone actually originated in Scotland; it was usually made with oats, and cooked on a griddle. However, today's scones are usually made with flour, along with a leavening agent, and baked in an oven; they are often an accompaniment to afternoon tea in England. The term scone most likely was derived from the Dutch word schoonbrot or German word schonbrot ('fine bread'); however, it could also have evolved from the Gaelic word sgon, which means 'wide mouthful'. The word scone was first found printed in the Aeneid in 1513.

The scone became a part of the English afternoon tea thanks to the The Duchess of Bedford, who had ordered for some sweet bread to be brought to her along with her tea. She liked it so much that it became a daily ritual, and this has been the tradition ever since. However you choose to serve them, scones are simple and delicious, and should be eaten soon out of the oven!!

Orange-Scented Scones
based on Alton Brown's scone recipe

2 cups all-purpose flour
4 tsp baking powder
3/4 tsp salt
1/3 cup of sugar
Zest of 1 orange
8 tbsp (1 stick) cold butter
3/4 cup heavy cream
1 egg

1.) Preheat the oven to 400 degrees F. Line a baking sheet with parchment paper or a Silpat liner.

2.) This next step can be done two different ways:
      ~ Combine the first 5 ingredients in a large mixing bowl. Cut in the butter with your hands, a fork, or a pastry cutter. Add the egg to the heavy cream and beat briefly to combine, then add to the dry ingredients.
      ~ Add the dry ingredients to the bowl of a food processor. Cut the butter into pieces and add to the dry ingredients; pulse until the texture resembles coarse breadcrumbs or small peas. Add the heavy cream, then allow the processor to mix the dough until it just comes together.

3.) Turn the dough out onto a floured surface and knead for 5 minutes, then roll out and cut into desired shapes.

4.) Place the scones onto the prepared baking sheet, then put into the oven for about 15-20 minutes, or until lightly golden brown.


I chose to make these scones completely by hand, with wonderful results - my orange was a Valencia, and perfumed them wonderfully. I ate them with honey, and enjoyed every bit. However, I also used salted butter when I made these (since it was all i had at the time), but if you are watching your sodium intake, I'd strongly suggest using unsalted butter instead. Live life, and eat well!

Sources:
History of Scones and Griddle-cakes
Scones: A Short History

Sunday, July 1, 2012

Creamy Orange Curd

For the first recipe to highlight the second Spotlight's On! ingredient, I am offering something that is pretty simple to make: orange curd. This wonderful spread is great on toast or yogurt for breakfast, as well as used in creme puffs (where it's a very tasty and not-too-sweet addition), and as a pie/tart/gallette filling. Other possibilities are of course available; use it like you would a marmalade or jam. Without further ado, here's my recipe for an easy orange curd.


Creamy Orange Curd

The juice and zest of 1 medium to large Navel orange
3 tbsp. butter
1 large egg
1 large egg yolk
1/2 cup sugar

1. Place all of the ingredients in a small saucepan; stir to combine.

2. On low heat, stir the mixture frequently until it thickens to your liking and begins to boil, at least slightly.

3. Strain the mixture into a glass jar or bowl, and allow to cool to room temperature.

4. Place plastic wrap over it (pressing it down so it comes into contact with the surface of the curd), and place in the refridgerator for at least 45 minutes. Once it has cooled, it is ready to use.


And there you have it! This post is short, sweet and to the point, but I hope that you find it useful. One thing to note, is that I used a spatterguard and a wooden spoon to strain the mixture, because the colander that I have has spaces that are too large to serve as an effective strainer in this case. (Don't judge me. I see your stares. lol) The wooden spoon helps to speed up the process. Live life, and eat well!


Tuesday, June 5, 2012

Alfredo sauce, from me to you

I have 3 words to describe last week: What a WEEK! Man, I never fully realized how difficult moving would be - UHaul trucks, storage, having a shortage of help (but wonderful friends that did all they could to help out at the last minute). Lots of things went wrong, but the end result worked out fine - plus, I'm finally out of housing "limbo": looking at places, but not having anything actually secured. Since last summer, I've really been getting a taste for what the real world is like; renting an apartment and paying bills for the first time was quite an experience. Through all of the tears, headaches, and even slight rage at times, I've had fantastic people as a support system, and parents that were very concerned and wanted to make sure that I had what I needed. In addition, I've learned a lot about what NOT to do the next time around. Thank goodness it's over with, and I can relax a little bit before I move again into my new place (yay!!!).


In the meantime, I tried thanking the people that helped me out by making them a massive spaghetti dinner; although it didn't work out, I'm going to try again when I move next week. Although I couldn't make everything from scratch (either due to time, or expense of ingredients), one thing I did want to make was my special Alfredo sauce, which I found to be surprisingly easy to pull together. Later in the summer, I hope to experiment with a tomato sauce but that's for another post.

This version is much tastier than the usual storebought brand, and is a little bit healthier because you know exactly what's going into it. Essentially, this is a béchamel sauce made with milk and enhanced with parmesan cheese; substitute with cheddar cheese for the perfect mornay sauce for mac & cheese!! To make it, you need 4 ingredients (not counting pepper), and about 10 minutes - that's it! Keep in mind that salt isn't necessary to add here, because the cheese has salt in it already.


My Alfredo Sauce

1 tablespoon Roasted Garlic butter, softened
1 tablespoon all-purpose flour
1/2 cup of whole milk (or light cream if you prefer)
1/4 cup of parmesan cheese, or more to taste
Pepper to taste

1. Preheat a medium saucepan on medium high heat; add the garlic butter. Meanwhile, cook the accompanying pasta and reserve about 1/2 cup of the pasta cooking liquid.

2. Once the butter has melted, add the flour and stir together vigorously to form a roux; when the mixture turns a very light brown (blonde) color, add the cream and continue stirring to work out the lumps.

3. Cook the sauce until the cream has reduced and the roux has melted into the sauce; add the cheese and stir some more. Add about 1/4 tsp of pepper, taste, then add more if needed. If the sauce is too thick at this point, add some of the pasta cooking liquid to thin it out.

4. Once the sauce is the right consistency, plate your pasta and pour the sauce over top. Stir well, then enjoy!


A little messy, but SOOOOOO good - yummmmm!!